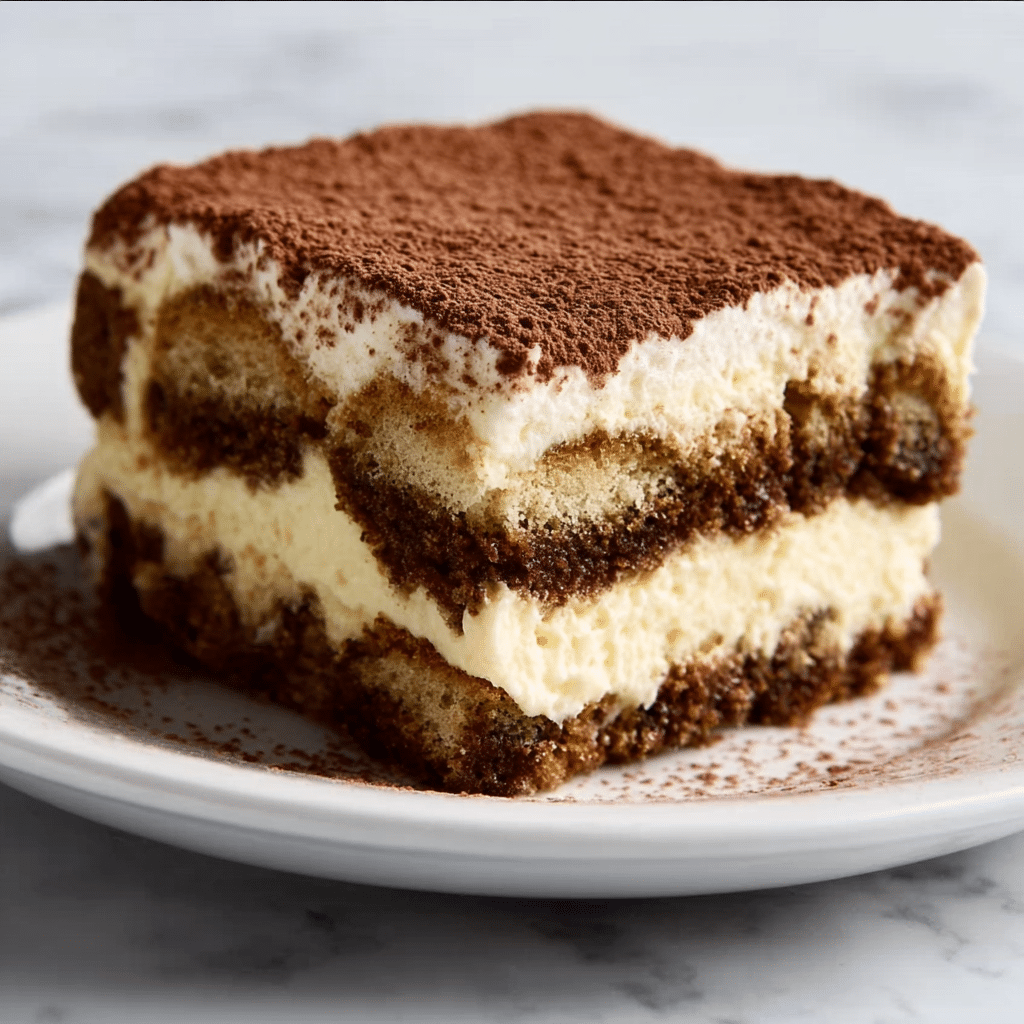
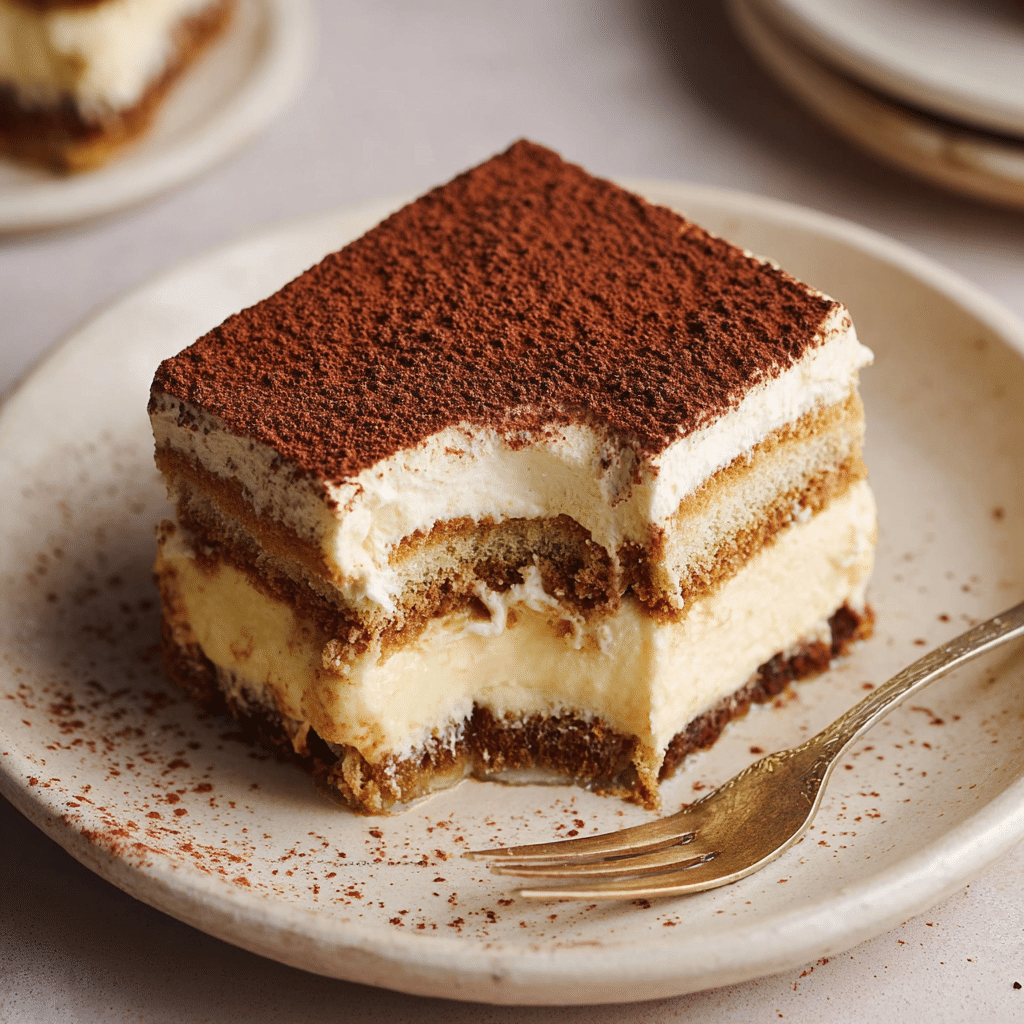
If there’s one dessert that perfectly sums up the art of Italian indulgence, it’s Italian Tiramisu. This showstopping, no-bake delight features layers of espresso-soaked ladyfingers, silky mascarpone filling, and a dramatic dusting of cocoa powder. Italian Tiramisu manages to pull off being rich, creamy, and elegant while still being completely approachable in your own kitchen. Trust me—once you’ve tried this classic, you’ll have every excuse to make it for holidays, dinner parties, or simply because it’s a Wednesday.

Ingredients You’ll Need
What makes Italian Tiramisu shine is its simplicity—a handful of straightforward ingredients that each play a starring role. Every component blends into a harmony of flavors and textures, so quality matters; trust your tastebuds, and let the ingredients speak for themselves!
- Egg Yolks: These form the rich base of the creamy filling, lending both structure and custardy flavor.
- Granulated Sugar: Sweetens the filling and helps the egg yolks whip up thick and pale.
- Mascarpone Cheese (room temperature): This Italian cream cheese is key for that ultra-creamy, slightly tangy flavor that’s signature to tiramisu.
- Heavy Whipping Cream (cold): Whipped and folded in, it gives the filling its light, airy texture.
- Strong Brewed Espresso or Coffee (cooled): Brings depth and a robust coffee flavor that soaks into the ladyfingers.
- Coffee Liqueur (optional): For grown-up flair and even richer coffee notes, a splash of liqueur like Kahlúa is wonderful (but totally optional).
- Ladyfinger Biscuits (savoiardi): These spongey Italian cookies soak up the coffee and keep each layer beautifully intact.
- Unsweetened Cocoa Powder: A generous dusting of cocoa finishes the dessert with a bittersweet edge and a gorgeous look.
- Dark Chocolate Shavings (optional): For a fancier finish, sprinkle some chocolate curls right before serving!
How to Make
Step 1: Prepare the Creamy Mascarpone Filling
The secret to that dreamy tiramisu bite lies in a rich, cloudlike filling. Start by whisking the egg yolks and sugar together over a gentle double boiler—this step not only creates that signature custard flavor but ensures a silky, safe base. Once the mixture is pale and thick, remove it from the heat and gently blend in the mascarpone until smooth and luscious. In a separate chilled bowl, whip the heavy cream until stiff peaks form, then carefully fold it into the mascarpone mixture. You want to keep all that air for maximum fluffiness!
Step 2: Soak the Ladyfingers
Pour your cooled espresso or strong coffee into a shallow dish, adding coffee liqueur if you’re channeling a classic Italian Tiramisu for adults. Take each ladyfinger and dip it for just a second or two—enough to absorb the coffee flavor, but don’t let them get soggy. This quick dip is key to perfectly-textured layers later.
Step 3: Layer Everything Up
Time to build the magic! Line the bottom of a 9×13 dish with half of your soaked ladyfingers, fitting them snuggly together. Slather half the mascarpone filling on top, smoothing it to the edges. Repeat with another layer of soaked ladyfingers and the remainder of the creamy mascarpone. Those neat layers guarantee every bite delivers the full tiramisu experience!
Step 4: Chill and Set
Cover your assembled Italian Tiramisu and let it rest in the fridge for at least 6 hours—overnight is even better. This gives the flavors time to meld and the dessert to firm up for clean, beautiful slices later. The wait might feel long, but trust me, the anticipation makes the first spoonful unforgettable.
Step 5: Serve with Style
When it’s finally time, pull the dessert from the fridge and finish with a generous dusting of unsweetened cocoa powder. Add chocolate shavings if you’re feeling fancy or indulging guests. Each spoonful should reveal distinct layers and a cloud of cocoa on top—pure Italian Tiramisu bliss!
How to Serve

Garnishes
The classic finish for Italian Tiramisu is a snowfall of unsweetened cocoa powder, which lends a touch of pleasant bitterness to balance the rich filling. For something extra special, scatter dark chocolate shavings or chocolate curls over the top just before serving. They add texture and make the presentation truly swoon-worthy.
Side Dishes
While Italian Tiramisu is a rockstar all on its own, you could offer some simple sides like fresh berries or a bowl of mixed fruit salad to contrast the richness. A scoop of vanilla gelato or a shot of espresso alongside also fits the Italian mood perfectly.
Creative Ways to Present
Take this beloved dessert to the next level by assembling individual portions in small glasses or jars for parties—guaranteed crowd-pleasers with minimal fuss. Another clever twist: build a “deconstructed” version on dessert plates with pieces of soaked ladyfinger, a dollop of mascarpone cream, and a dramatic cocoa powder swoosh. Italian Tiramisu can truly be as elegant or laid-back as you like!
Make Ahead and Storage
Storing Leftovers
Italian Tiramisu keeps surprisingly well for a couple of days—just cover your dish tightly with plastic wrap and store it in the refrigerator. Enjoy within 2–3 days for best flavor and freshness. The longer it sits, the softer and more deeply flavored the ladyfingers will become, so don’t worry if you’re making it ahead for an occasion.
Freezing
If you need to stash your tiramisu for longer, you can freeze it! Cut into individual portions, wrap each piece tightly in plastic, then foil, and store them in an airtight container. Thaw overnight in the fridge for best texture; just note the cream might be slightly softer upon thawing, but still delicious.
Reheating
This dreamy dessert is meant to be enjoyed cold, straight from the fridge. No reheating required! In fact, the chilled experience is part of what makes Italian Tiramisu so refreshing and tempting, even after a heavy meal.
FAQs
Is it safe to use raw eggs in Italian Tiramisu?
Great question! In this recipe, the egg yolks are gently cooked over a double boiler, making the filling creamy and safe to eat. If you’re still concerned, look for pasteurized eggs at the store for extra peace of mind.
Can I make Italian Tiramisu without coffee liqueur?
Absolutely! The liqueur is optional and can be omitted if you prefer a non-alcoholic or more kid-friendly dessert. The espresso or strong coffee alone still brings fantastic flavor.
What can I substitute for mascarpone cheese?
If you can’t find mascarpone, you can use a combination of cream cheese and heavy cream (about 3 parts cream cheese to 1 part cream), but the taste won’t be quite as luscious and authentic as traditional Italian Tiramisu.
How do I keep the ladyfingers from getting too soggy?
The trick is to dip, not soak! Just a quick 1-2 second dip is all you need—as soon as the ladyfinger feels slightly soft but still holds its shape, you’re good to go.
Can I make Italian Tiramisu ahead of time?
Tiramisu is actually at its best when made ahead. Assemble it the night before your event and let it chill in the fridge overnight. The flavors deepen and the dessert holds together beautifully for serving the next day.
Final Thoughts
If you’re ready to embrace cozy Italian vibes and treat your loved ones to a slice of heaven, Italian Tiramisu is the recipe to make. It’s a personal favorite for good reason: simple ingredients, luxurious results, and always a dessert table showstopper. Go ahead—give it a try, and let this classic become a tradition in your kitchen too!
Print
Italian Tiramisu Recipe
- Total Time: 6 hours 35 minutes (including chilling)
- Yield: 12 servings
- Diet: Vegetarian
Description
Classic Italian tiramisu — a luscious, no-bake dessert made with layers of espresso-soaked ladyfingers, creamy mascarpone filling, and a dusting of cocoa powder. Elegant, rich, and surprisingly easy to make.
Ingredients
Egg Mixture:
- 6 large egg yolks
- 3/4 cup granulated sugar
Mascarpone Filling:
- 2 cups mascarpone cheese (room temperature)
- 1 1/2 cups heavy whipping cream (cold)
Other Ingredients:
- 2 cups strong brewed espresso or coffee (cooled)
- 2 tbsp coffee liqueur (optional, e.g., Kahlúa)
- 2 packs (about 14 oz) ladyfinger biscuits (savoiardi)
- Unsweetened cocoa powder (for dusting)
- Dark chocolate shavings (optional, for garnish)
Instructions
- Prepare the filling: In a heatproof bowl, whisk egg yolks and sugar over a double boiler until thick and pale (about 5 minutes). Remove from heat. Stir in the mascarpone cheese until smooth and creamy.
- Whip the cream: In a chilled bowl, whip heavy cream until stiff peaks form. Gently fold into mascarpone mixture until combined.
- Coffee soak: In a shallow dish, mix cooled espresso with liqueur (if using). Quickly dip each ladyfinger (1–2 seconds, do not soak).
- Assemble layers: In a 9×13 dish, layer half the soaked ladyfingers. Spread half the mascarpone mixture over them. Repeat with another layer of ladyfingers and remaining mascarpone.
- Chill: Cover and refrigerate at least 6 hours, preferably overnight, for best flavor and texture.
- Serve: Dust with cocoa powder and garnish with chocolate shavings before serving.
Notes
- For a kid-friendly version, skip the liqueur.
- Best served within 2–3 days.
- Make sure mascarpone is at room temperature before mixing for a smooth filling.
- Ladyfingers should be dipped quickly — too long and they’ll fall apart.
- Prep Time: 30 minutes
- Cook Time: 5 minutes (for egg mixture)
- Category: Dessert
- Method: No-bake
- Cuisine: Italian
Nutrition
- Serving Size: 1 slice
- Calories: 320
- Sugar: 18g
- Sodium: 90mg
- Fat: 22g
- Saturated Fat: 12g
- Unsaturated Fat: 8g
- Trans Fat: 0g
- Carbohydrates: 26g
- Fiber: 1g
- Protein: 5g
- Cholesterol: 180mg


